As industry-leading SharePoint consultants, we provide strategy, create and implement solutions, and offer ongoing support across the SharePoint platform.
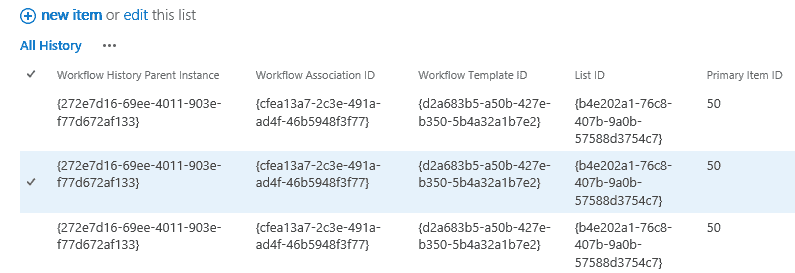
Have you ever viewed the Workflow History log in SharePoint and found yourself wanting more useful detail? If you are accustomed to using the out-of-the-box configuration, there’s a good chance you have had this experience. The built-in log has some inherent issues:
- Difficult to access.
- Doesn’t capture all the information you may want to see such as: Reason for Change,
Description of Change, Approval Comments and Review History. - Captures too much system information that you may not need to see including: Workflow History Parent Instance, Workflow Association ID and Workflow Template ID.
- It is purged over time when the workflow completes, meaning it is not ideal for audit history. Based on our experience with customers, this is a key reason why companies implement approval workflows in the first place.

Below, we will show first how to create a new Approval History list. Secondly, we will show how to modify the built-in Document Approval workflow to collect more useful data.
List Setup
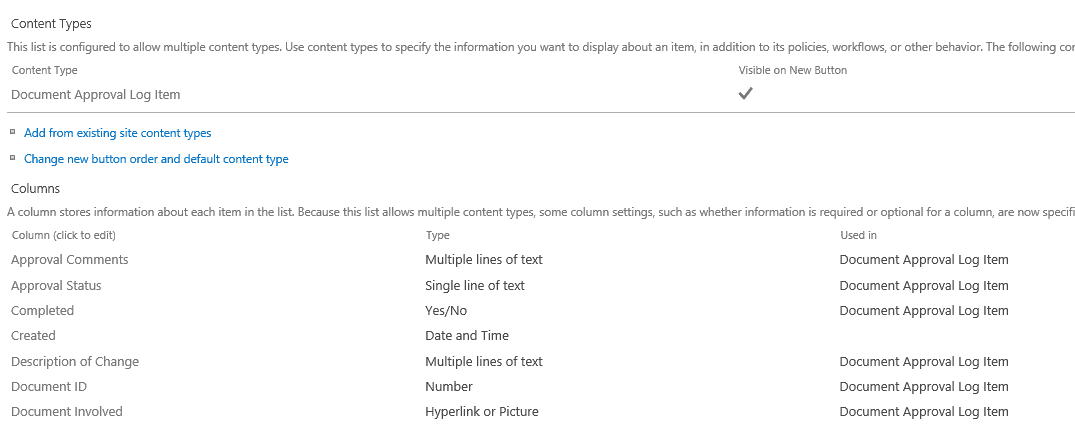
- From your SharePoint site, create a content type called Document Approval Log Item.
- Create columns for each type of data that you want to collect. For our example, we will add:
Document Involved (Hyperlink or Picture).
b. Approval Status (Single Line of Text).
c. Approval Comments (Multiple Lines of Text). - Create a new list called “Approval History.” Select Site Contents > Add an app > Custom List.
- Open the new list and select List Settings. Select Advanced Settings and set “Allow management of content types” to Yes. Click OK.
- Under Content Types, select “Add from existing site content types”. Select the Document Approval Log Item content type.
Workflow Setup
Next, we will customize the built-in Approval Workflow using SharePoint Designer to collect the data that will populate the new fields. Note: The following steps and the built-in workflow name are the same for all versions of SharePoint, including 2010, 2013, 2016 and Office 365 (O365).
- Open Designer and make a copy of the “Approval – SharePoint 2010” workflow.
- Name the copy of the workflow “Approval Process”. Edit the new copy.
- Assign to All content types. This is required to allow us to use this as the publishing workflow.
- Set the following options under Workflow Settings.
Name: Approval Process.
Disable automatic start on item creation option = Checked.
Disable automatic start on item change option = Checked.
In the Approval Workflow task > General Settings > check the Only allow task recipients and process owners to read and edit workflow tasks. - Add a new activity at the end of the workflow to create an item in the Approval History list. This is where we capture the Approval Status, Approval Comments, etc.
- Save the workflow. Check for errors.
- Publish the workflow and test it.
When your test is complete, open the Approval History list to view the collected data.
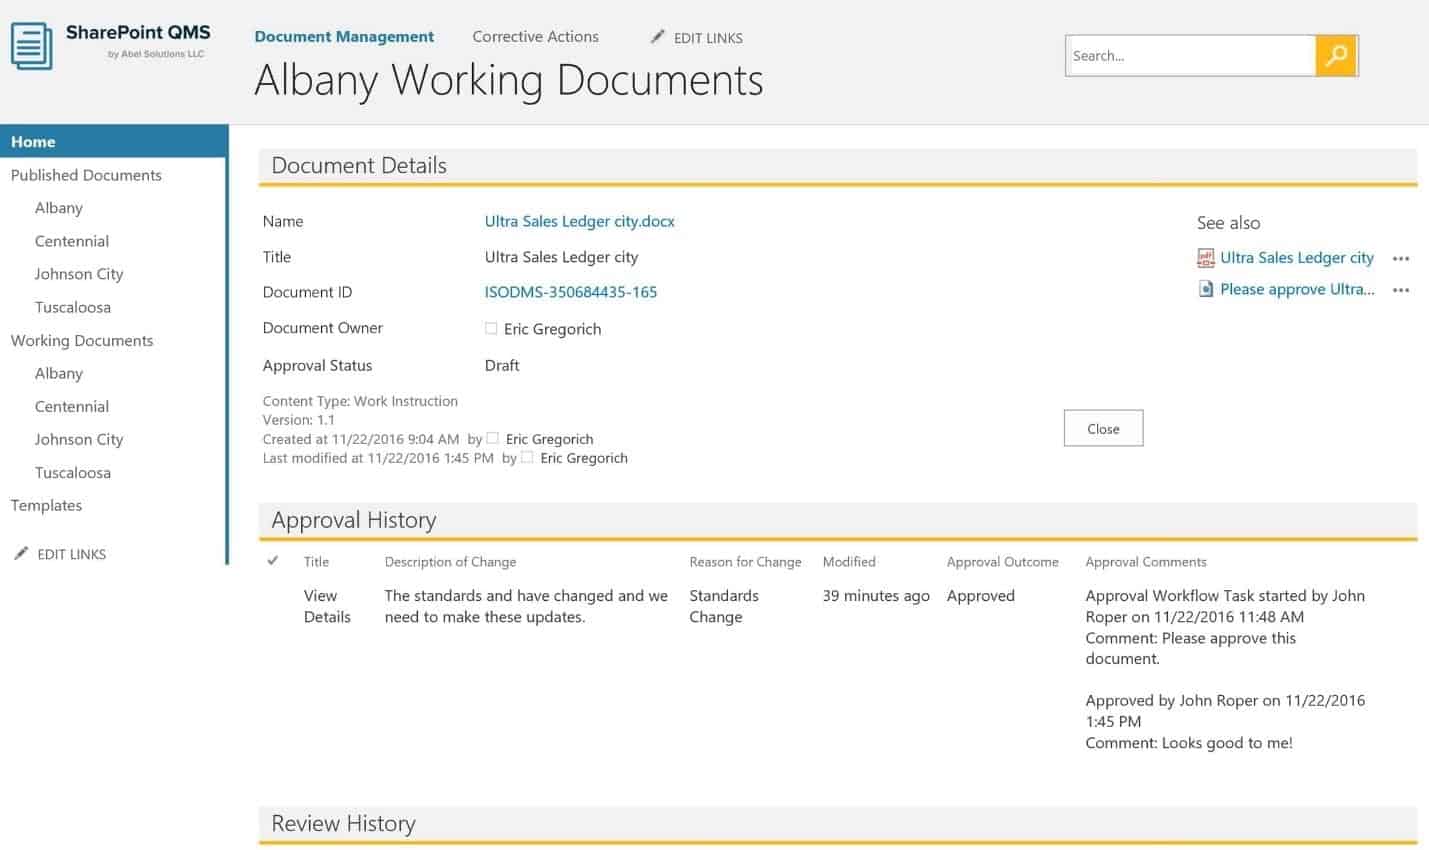
As shown below in our SharePoint ISO/QMS (Quality Management) solution, we have taken this one step further by creating a custom document properties page that pulls together important information about a specific document – properties, approval history and review history. This streamlines the process of reviewing document history for audits, compliance or other tracking requirements.
Conclusion
With these steps, you can enable easy access to more valuable data regarding your document approval and review process that you won’t get with the built-in Workflow History log including: Reason for Change, Description of Change, Approval Comments and Review History.
This data can add business value by enabling better insight into when and why documents are reviewed and changed. Further, you can maintain long-term audit records that will meet your business and compliance requirements.
This tip written by Abel Solutions’ SharePoint Consultant John Roper.

