For more about how we customize SharePoint solutions for your company’s needs, visit our SharePoint Consulting page.
SharePoint is a great platform to provide a wide range of functionalities right out of the box. However, it is common that a custom action is needed to fulfill a particular need of the business users. Custom actions allow for extending the core features of SharePoint. More importantly, they can be done without the use of codes.
SharePoint Designer is a free tool that allows users to make changes and customizations to SharePoint without the need for codes. Commonly used by IT and business users, the tool can add features to SharePoint through intuitive interface and ribbon controls.
In this TOTM, we will provide two examples of how you can use a Custom Action to create a feature in SharePoint.
The Basic
In the first example, SharePoint Designer is used to create a ribbon button for SharePoint list or library. Once clicked, the button will perform a custom action function.
Step 1 – SharePoint Designer
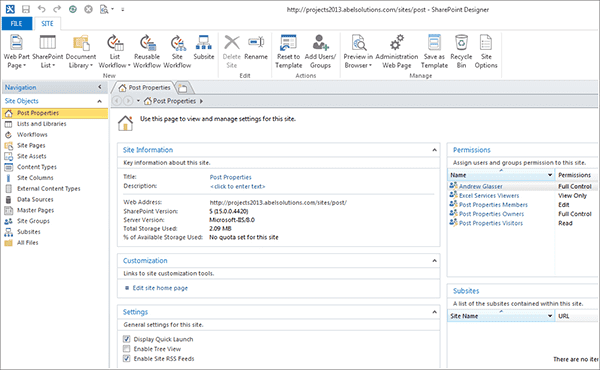
In SharePoint Designer, open the site containing the library or list where the custom action will be deployed.
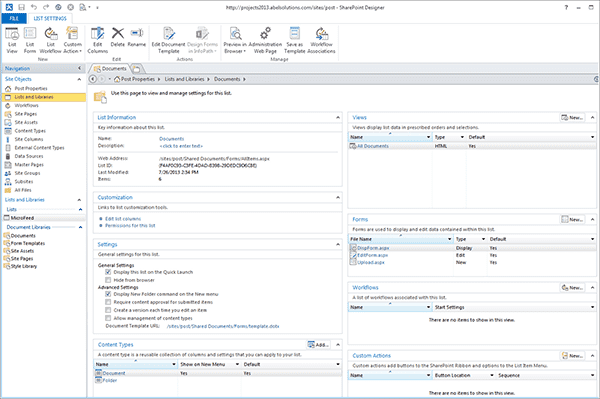
Open the library or list.
Step 2 – Create Custom Action
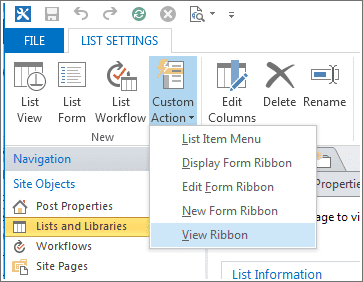
Create the custom action by clicking on “Custom Action” button from ribbon and select “View Ribbon.”
Give the custom action a name and description
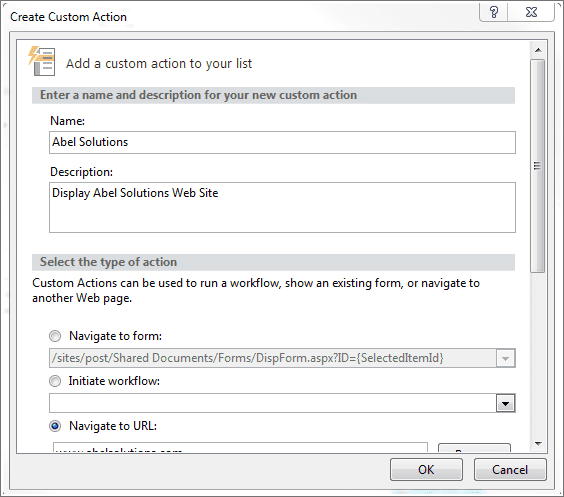
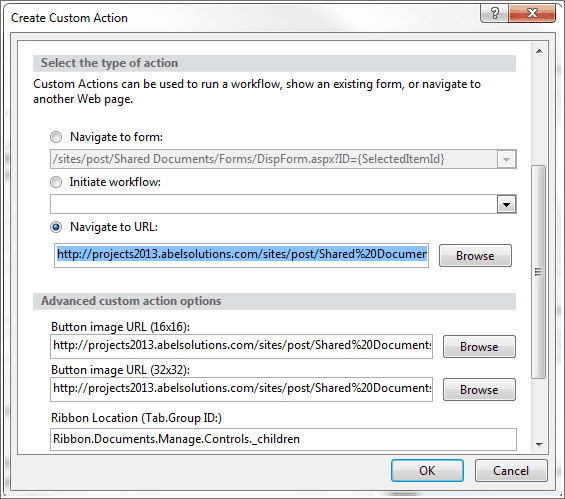
Select Navigate to URL and enter the URL for the action. In this example, the button will navigate to the Abel Solutions homepage.
Also, select the URL of the image to display on the ribbon button.
Click OK.
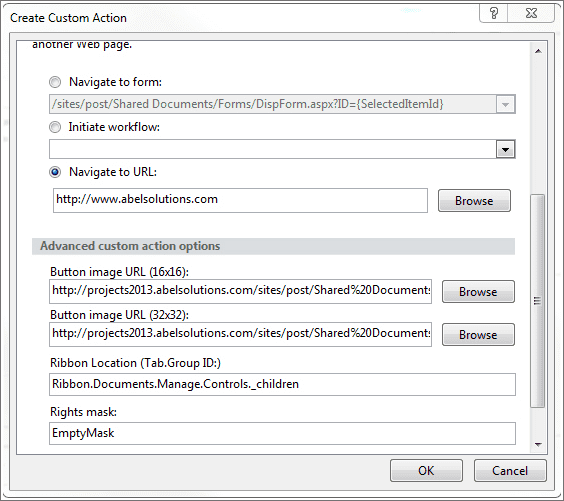
Step 3 – Test the Ribbon Button
Navigate to the site and library where custom action was created.
Click on the “Files” tab in the ribbon.
Locate the new custom action button.
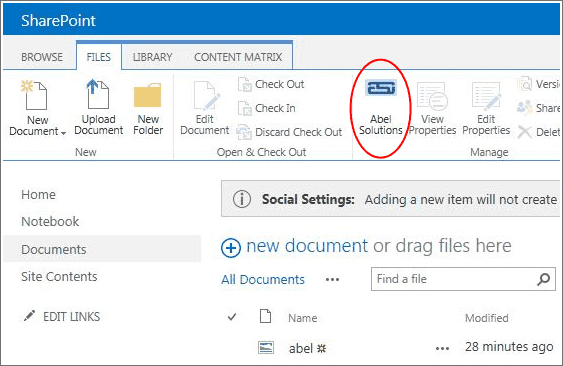
Click on the new custom action button. The browser shows the company homepage.
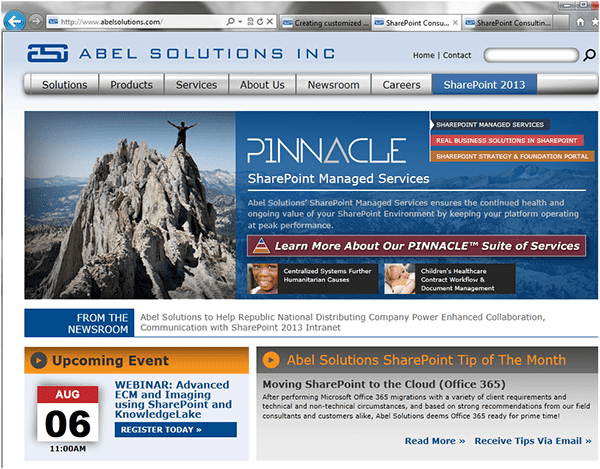
Example #2: Something more powerful… and useful
In the next example, a new view is created which provides an aspx page. The script is then inserted into the aspx page. Then the custom action button will link to the aspx page and execute the script.
First, create a new view in the library.
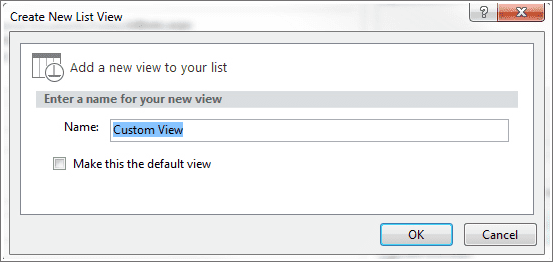
Next, open the new view in code view and insert scripts at the end of the code.
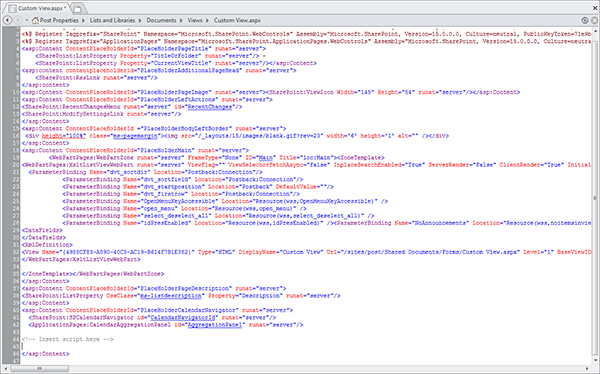
Then, edit the custom action and use the URL of the new view created.
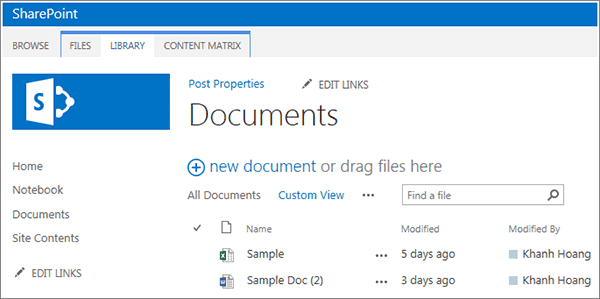
Next, open the library or list and click on the custom action button.
Custom view will display and script is executed.
Conclusion
Creating Custom Actions with SharePoint Designer is a sure-fire way to customize your SharePoint interface without requiring extensive developer experience. Integrating just a few Custom Actions can make a huge difference in the experience of your users – in both time saved and experience simplified.
This SharePoint Tip of the Month was contributed by Senior SharePoint Consultant Khanh Hoang.
As a Microsoft Gold Partner, we offer Microsoft 365-based solutions to help businesses become more productive and efficient through collaboration.
If you’d like to learn more about how our SharePoint solutions can transform your business, visit our SharePoint Consulting page.


